Hydroponics! Better Late Than Never!

Standard

FINALLY!

20180128_210910.jpgWe changed a few things from our original charted rubric, it’s not a huge change, just some vegetable changes because we had a few extra sprouts of basil and bush beans.


*** this rubric is subject to change at any point as the amount of space needed may vary if more plants are put in the “vacant place holder” spaces.

20180127_1913021.jpg


Our sprout-lets let us know that they were ready to go into the hydro tent so we obliged.  The peppers are, of course, taking their time so we did not plant any of those because we are waiting for them to break the surface, but everything else has come up.


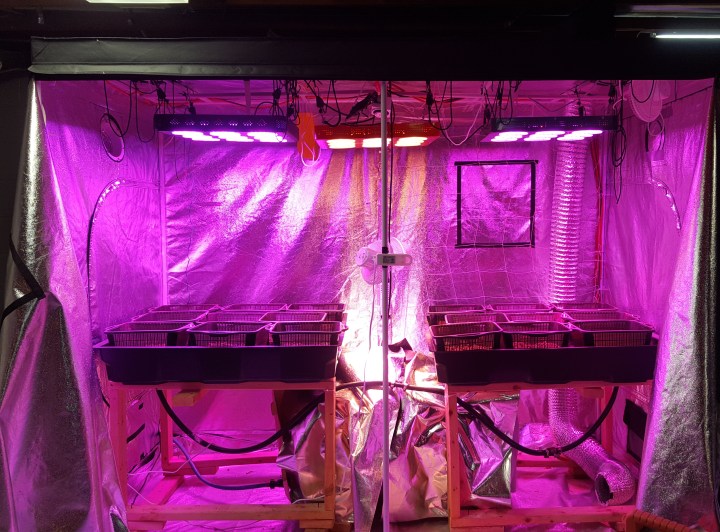
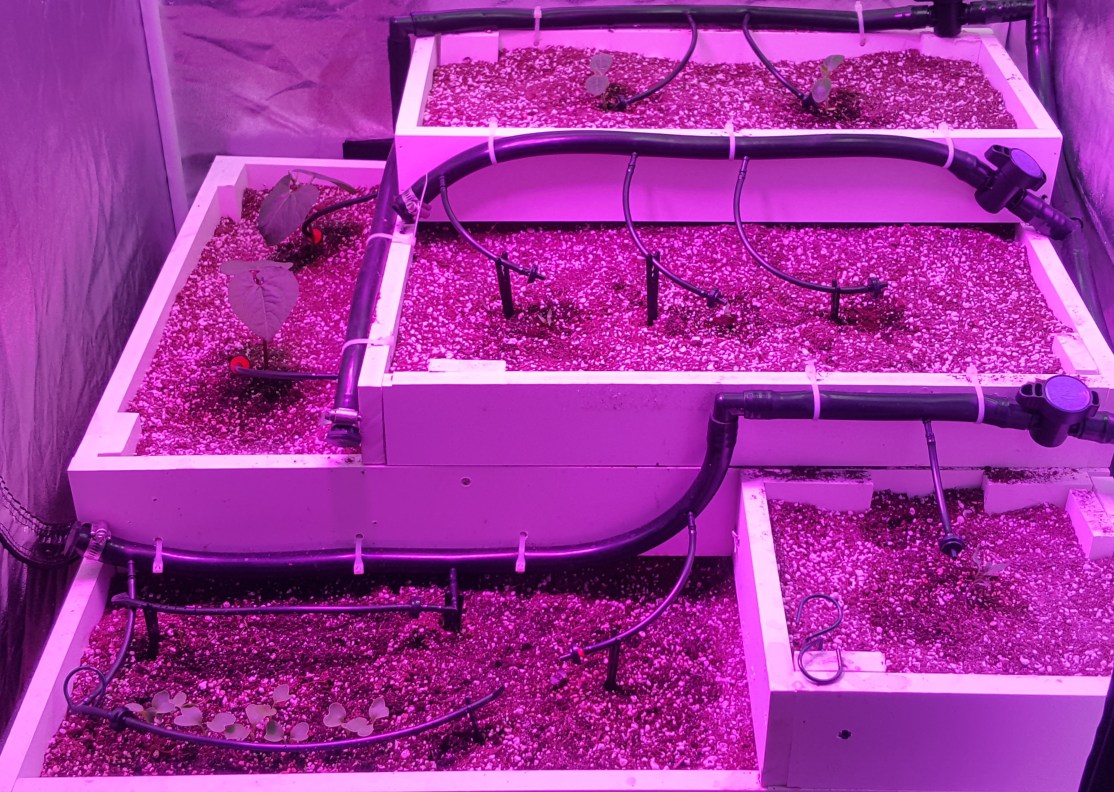
Here is an overview picture of our tent with the baskets:

20180128_1514181.jpg

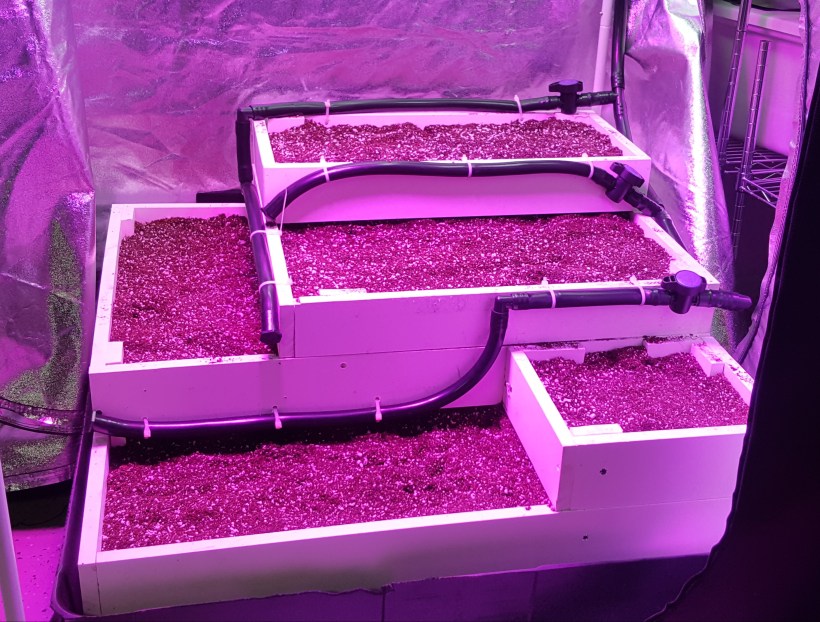
Here are some baskets with sprouts, we filled up the reservoir and added our first set of nutrients.  We flooded the table for a bit just to get the plant’s roots wet and get them settled a bit in their new homes with the hydrocorn (things tend to shift after they are placed in the baskets).  The timer is currently set for a 16 hour time cycle just like the soil tent.  The water reservoir is set for 5 cycles per day currently and will be scaled back once the roots establish and the plants grow some.

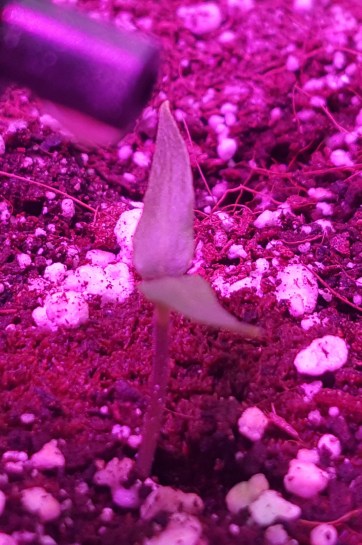
They are hard to see, but I promise our little anemic plants are there in the big wide world of hydrocorn pellets.


20180128_160137

Top Row:
Brussels Sprouts/Vacant/Cucumbers

Middle Row:
Peppers (Not Yet Planted, NYP)

Bottom Row:
Peas/Pepper (NYP)/Bush Bean


20180128_160123.jpg
Top Row:
Porterhouse Tomato/Vacant/Bell Pepper (NYP)

Middle Row:
Basil/Peppers (NYP)

Bottom Row:
Cherry Tomato/Lettuce types


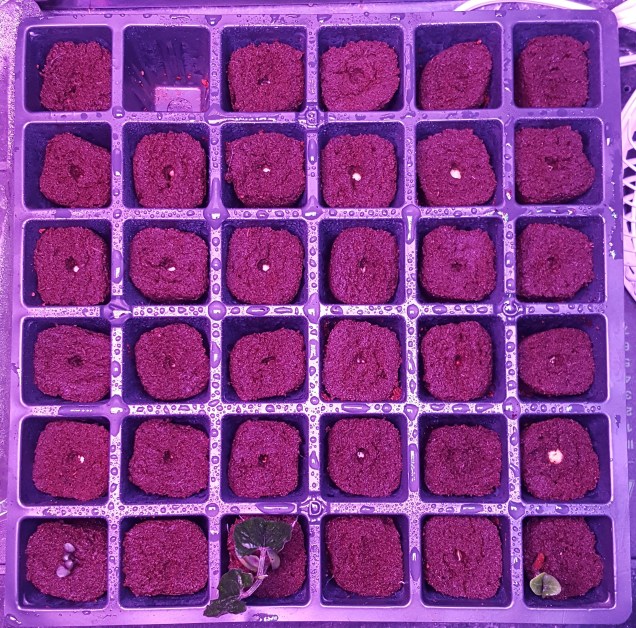
The lettuce box was established…

So what we have here is (from left to right):

20180129_212551
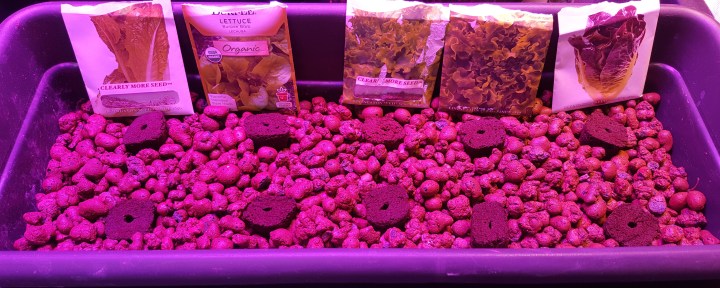
Romaine / Burpee Bibb / Grand Rapids / Buttercrunch / Red Romaine

20180129_212622.jpg

Based on how the lettuce box grew last year, I am sure that we should have quite a nice flourishing crop this year.


Week 2 Indoor Soil Tent Progress

Standard

20180128_192921.jpg

I followed the first week schedule for the Roots Organics feeding system and found that the worm castings in the Buddha Grow product settled in the bottom of our reservoir.  The worm casting sludge is not a big deal, but does make for a messy cleanup from week to week when I change out the water and re-fertilize the plants for the next week.  Overall, I will have to make sure to check the water feed lines well just in case they get clogged with the worm castings during their daily watering.  Midway through the week I found that I had to add water to my reservoir, which I find to be serendipitous as I had planned to water down the reservoir halfway through the week in order to start flushing for the new additives by the time the fertilizer change out is to occur regardless.  Currently, the timers are set to water once per day.

The light timers are currently set for 16 hours per day during the vegetative cycle.  We could leave the lights on for a 24 hour cycle, but the lights are set for 16 hour cycles so that the plants are not too freaked out when the change over to a 12 hour light cycle happens during the bloom cycle.

The plants seem to be thriving well, so without further ado, here are some wonderful bragging pictures from the top of the soil structure to bottom:

Squash(s)

20180128_192854

20180128_192858

Beans 20180128_192746

Early Girl Tomato

20180128_192815.jpg

 Bell Peppers, both Monster Bell and Green Bell

20180128_19282220180128_1928281.jpg

Opal Basil

20180128_192803.jpg

   Radishes

20180128_192749

  Carrots!!!

(they just decided to come up so while they are teeny tiny in the picture, they are actually pretty big for only having been up a few days)

20180128_192755


2018 Hydroponic Start Up!

Standard

It’s finally beginning.  We are running a little late this year, but better late than never.

20180120_181945


This is the plan that we have for this year’s set up:


Our seedlings have been put in the starter growing medium (not rock wool) and here is their non-sprouted debut:

20180121_212705.jpg

20180121_212813.jpg


As things begin to grow we will move them over to the hydroponic tent into the pots with the hydro-pebbles.

2018 Winter Outdoor Soil Experiment

Standard

The beginnings of our soil “experiment” start with our planter boxes which we had already established a few years ago and installed irrigation set-ups in each box (smartest thing we did in that garden!).   For now, just because this is new for us, we are only using one planter box to see how well it works.

20180121_155330.jpg
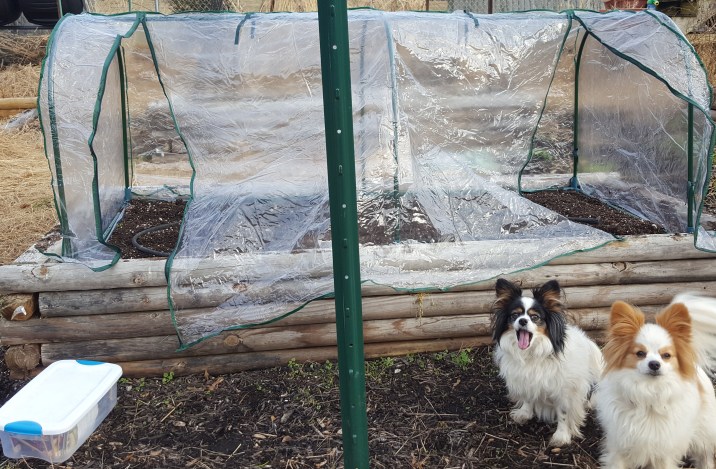
We purchased greenhouse domes made by Outsunny which fit our box which measures approximately 8’x4′.  Rory and Chewy really wanted to be in the photo. We added a little peat moss in and tilled the soil (yes, I know, gasp… we should be turning it by hand with a shovel, but to be fair, it’s winter and soil tends to be hard.)


20180121_16000820180121_160012


The basic of outdoor plants that we, in our household consume were planted
(in order from left to right):

  • Peas
  • Brussels Sprouts
  • Broccoli
  • Beets
  • Acorn Squash
  • Onion (red and yellow, planted throughout the whole garden).


As the season progresses, updates will be posted.

Planted Indoor Soil Garden!

Standard

20180120_20561220180120_195106


Here is the key to our indoor soil garden.  It is coming along fantastically.


20180120_194131

Although it’s hard to tell from this angle, the squash have sprouted slightly.  It’s going to be a little tight for them but we will see how it goes as they grow and mature.  The bell peppers have barely broken from the shell so I planted them just to get them in the ground and start the watering cycle with the rest of the plants.


20180120_194126


The beans have clearly come up and will hopefully flourish well.  They started to look a little wilty when I planted them but they bounced back just after their first water cycle.


20180120_194133


The early girl tomato also wilted slightly but came back just like the beans did after their first watering.


20180120_194140

Its hard to see the basil, but there is basil here in this little spot next to the tomato.


20180120_195033

I planted a row of radish and a row of carrot to see how they do in the indoor soil tent.  Last year in the window pots, the only things that seemed to do well overall were the radish and the lettuce so this is also my trial and error.

2018 Water Delivery Drip System Setup

Standard

FINALLY, NO MORE HAND WATERING!

With the new setup, a water drip system was developed for the soil tent.  Here are the components we used:

20180114_173752

The white reservoir is a 10 gallon holding tank.  Inside of the tank will be a submersible water pump for the water distribution and an oxygen pump with stones connected to aerate the water.  This is in an effort to keep down algae and nutrients in the water from settling.

20180114_191752.jpg
Connected to the white water reservoir is 3/4in tubing which has been directed up through a hole and then down to each of the tiers of the box.  There is an on/off valve connected to each tier for both water flow control and also for any issues which may arise in the event of any blow outs or leakage problems.


20180114_192837


For the actual water delivery, spaghetti tubing will be directed to each plant with a disk that outputs a specific amount of water per hour, or with those plants such as radish and carrot, there is a unidirectional broadcast head that will distribute water in the same method.  Each shown in the picture was placed in the box to pressure test for leaks and double check the rate of delivery for each disk.


20180114_192757


The green disk (the light makes it look black, but it is really green) provides water at a rate of 2/gal per hour.


.20180114_192803

The black disk provides water at a rate of 1/gal per hour.


20180114_192807


The red disk provides water at a rate of .5/gal per hour.


Overall, I may use the red emitters more than the others, but each has it’s own benefits depending on the plant and its water requirements.

2018 Soil Nutrition New Product Trials

Standard

So this season I will be doing a few things differently.

I layered the new structure with different soil compositions using a combination of a few different substrates:

Layer 1:

20180114_18032320180114_180407

Started off with the GS-1 Hydro stones as the base in the structure.  This allows for drainage.


Layer 2:

20180114_18103920180114_181053


The next layer features a layer of GS-2 Hydro stones Pro-Mix.  The mycorrhizae works in symbiosis with the plant roots with mineral absorption in a complex way.  If interested, here is the MSDS for the Pro-Mix.

Layer 3:

20180114_181632


I used a small amount of the GS-2 Hydro stones, a small amount of Pro-Mix and a large amount of potting soil by Fox Farm called “Ocean Forest.”  This soil specifically contains amounts of calcium carbonate from the sea creature additives.   MSDS for Ocean Forest potting soil.


Layer 4:

20180114_181923

For this layer, I mixed an amount of the “Ocean Forest” potting soil with another of the Fox Farm products, “Salamander” potting soil.  This soil has some water absorption properties, but also includes an amount of leaf litter and such that is a great first layer for all gardens.  MSDS for Salamander potting soil.


Layer 5:

My final layer was simply a solid layer of the Salamander potting soil.   Overall, its a pretty good mix of nutrients and organic material.


***Keep in mind that this is a test.  A review of how the products did during the season will be done throughout and overall at the end of the season.***


Day 1 Soil 2018 Season

Standard

Today we started the seedlings for the indoor soil garden:


As you can see by the above list, starter seeds were planted for squash, bell peppers, tomatoes, beans and basil. We will also be planting carrots, beets and radish.

20180113_212703

The new structure for the tent was placed in the tent and we finished purchasing the last of the pieces for the irrigation system and fertilizer set up.  This year I will be experimenting with new products.